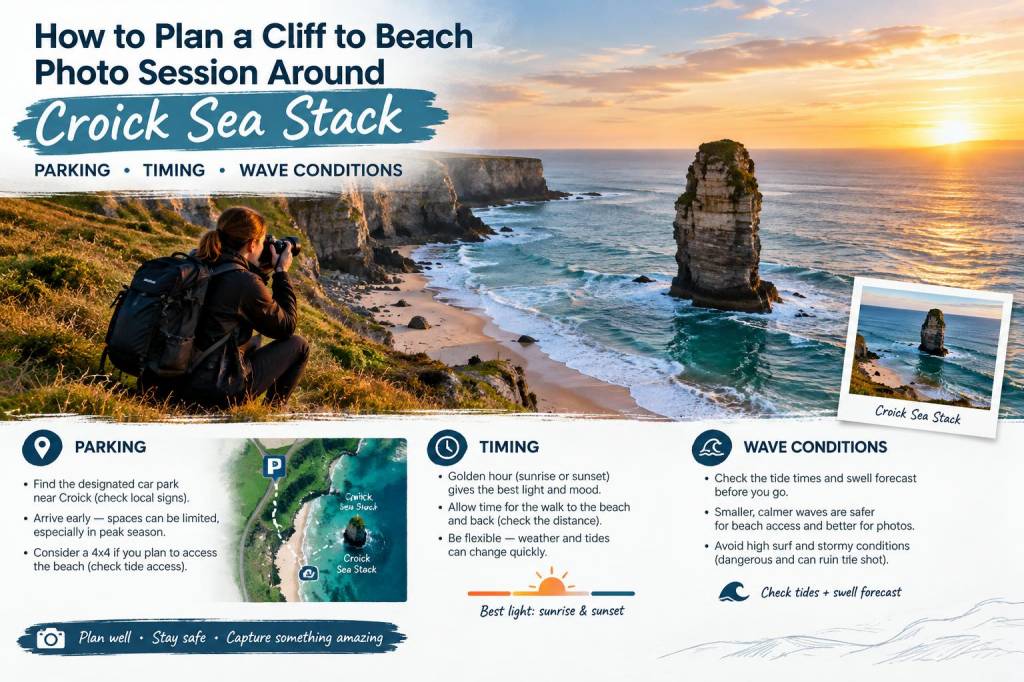
I have learned that a strong cliff-to-beach photo session starts long before I lift a camera to my eye. Around Croick sea stack, success depends on a simple mix of preparation, patience, and respect for a place that changes with every tide and every shift in light. When I plan a shoot here, I am not just chasing a single frame. I am working with distance, access, weather, surf, and the way the landscape opens up as I move from higher ground down toward the shore.
What makes this location so rewarding is the contrast. One moment I am working from a cliff edge with a wide view across rock, sea, and sky. A short while later I am down near the beach, looking back at the stack with a completely different sense of scale. That change in perspective is what gives a cliff-to-beach session its energy, but it also means I need a plan that keeps me safe and keeps the day productive.
Starting with access and parking
Before I think about composition, I always sort out access. In remote coastal areas, parking can shape the entire rhythm of the session. I want to arrive early enough to avoid rushing, and I want to know exactly where I can leave my car without blocking a narrow track or disturbing local residents. If the parking area is small, I plan for a backup option in case I arrive and find it full.
For a location like Croick sea stack, I also check whether the approach involves private land, a rough track, or a path that becomes muddy after rain. A quick look at a map is never enough for me. I read recent local notes, scan satellite imagery, and pay attention to any signs about access, livestock, or seasonal restrictions. If I am unsure, I choose caution and adjust my route rather than forcing a plan that may cause problems later.
I like to arrive with enough time to walk from the parking area to my first viewpoint without carrying the pressure of a rising tide. That extra margin gives me room to explore the terrain, identify safe footing, and make decisions about where I will start shooting. When I am carrying a tripod, filters, and a second lens, I value a parking spot that keeps the approach manageable.
Timing the light around cliff and shore
Light matters more than almost anything else in a scene like this. I prefer to think in layers: first the overall weather, then the sun position, then the small changes in brightness as clouds move over the water. A dramatic cliff-to-beach session often works best when the light is soft and directional, which is why I pay close attention to sunrise, sunset, and the hour on either side.
Early morning can be excellent if I want calm textures on the sea and fewer people in frame. Late afternoon can bring warmer tones and longer shadows that help define the rock face and the form of the stack. If the sky is fully overcast, I do not dismiss the session. Instead, I treat that as an opportunity for even light, richer colour in the stone, and a moodier coastal feel. Overcast conditions can be especially useful when I want to photograph the stack itself without harsh contrast.
I often use a weather app, but I do not rely on it alone. At the coast, conditions can shift quickly. I check wind direction, cloud cover, tide tables, and swell forecasts, then I look again when I arrive. If the light is promising but the sea is too wild for a safe beach approach, I stay higher and work the cliff-top views first. That flexibility is one of the reasons I enjoy these sessions so much.
Reading wave conditions before I move lower
Wave conditions decide how much of the beach is available, how clean the foreground will look, and whether it is wise to descend at all. I never treat the shoreline as a static space. I watch the set pattern for several minutes before I commit to a lower position. I look for the size of the waves, the gaps between sets, and whether water is surging around rocks farther down the shore.
If I am hoping for a reflection, a wet sand strip, or a line of foam near the stack, I time my move carefully. I want enough water on the beach to create interest, but not so much that I lose safe footing or get trapped by a rising set. When waves are large, I often stay back and use a longer lens to compress the scene. That approach keeps me safe and can produce a stronger image by isolating the stack against the moving sea.
I also pay attention to wind. Strong onshore wind can throw spray into the air, which may look beautiful in a frame but can quickly cover the front element of a lens. In that situation, I keep a microfiber cloth in an easy pocket and I work from positions that let me clean gear without turning my back to the water for too long. If gusts become difficult, I may switch to a more sheltered angle or delay the lower beach portion of the session.
Choosing a shooting order that makes sense
When I plan a cliff-to-beach session, I like to think of it as a moving sequence rather than a single stop. I usually begin at the highest safe viewpoint and build from there. That lets me capture the broadest landscape first, while my energy is fresh and the light is still changing. Then I work downward in stages, stopping at each level to reassess the view and the sea.
This order helps me avoid wasting time on the beach if the upper viewpoints already offer the strongest frame. It also means I can adapt if the weather changes. If a cloud break creates a sudden shaft of light across the water, I can stay high and take advantage of it. If the tide exposes a striking line of wet rock, I can move lower and switch to a more intimate composition.
My camera bag usually contains a wide-angle lens for the sweep of the coastline and a mid-telephoto lens for tighter studies of the stack and surrounding textures. I sometimes carry a neutral density filter if I want to slow the water enough to show movement. A tripod is useful, but I do not insist on using it everywhere. On uneven ground, I would rather make a simpler handheld frame than risk a clumsy setup in an unstable spot.
What I look for in a strong composition
At Croick sea stack, I am drawn to layers. I want foreground texture, a clean middle distance, and a strong anchor point in the stack itself. The best frames usually have a sense of depth, with rock leading the eye from the lower edge of the image toward the sea stack and then outward to the horizon. If the beach offers lines in the sand, tide pools, or a chain of stones, I use those elements to guide the viewer’s eye.
I also look for scale. A sea stack can feel imposing on its own, but placing it beside a cliff edge, a patch of surf, or a tiny human figure can reveal just how dramatic the landscape really is. If I include a person, I keep them small and thoughtfully positioned so they add context without distracting from the scene. I often ask a companion to stand still near a useful line in the composition while I adjust framing and focus.
Colour matters too. On some days the palette will be restrained, with grey rock, silver water, and muted sky. On others I may get warm light touching the cliff while the sea stays cool and blue. I pay attention to contrast between dry rock and wet surfaces because that contrast can carry a frame even when the sky is plain.
Safety habits I never skip
No photograph is worth slipping on algae-covered rock or getting cut off by tide and surf. I always check the tide table before I leave, and I give myself a generous buffer. Even when a beach looks spacious, water can return faster than it seems. I also avoid turning a narrow route into a one-way trap by walking too far along the shore without checking my exit.
These are the habits I keep on repeat:
- I check tide, swell, and wind before I travel.
- I watch wave sets for several minutes before moving closer.
- I keep my phone charged and stored in a dry pocket.
- I wear boots with reliable grip on wet rock and uneven ground.
- I stay aware of my exit route at every stage of the session.
- I avoid standing on unstable edges for a single frame.
If the sea looks more powerful than expected, I do not force the beach part of the plan. I would rather leave with a set of cliff-top images than take avoidable risks. That is especially true in remote coastal places where help may be far away and footing can be deceptive.
Weather changes that can improve a session
Some of my favourite coastal photographs have come from imperfect weather. A passing shower can darken the rock and make the sea stack stand out more clearly. Thin mist can soften the background and create a layered mood. Even a brief opening in heavy cloud can transform an ordinary shoreline into something unforgettable.
When the forecast is mixed, I bring weather protection for my gear and treat the day as a flexible field session rather than a fixed shoot. I have learned that the coast rewards patience. If I wait through a dull stretch, I often get a better moment later when the light breaks and the water begins to glow. That is one reason I like to keep my route simple and my expectations open.
| Condition | What I look for | My approach |
|---|---|---|
| Calm sea | Reflections, clear foreground detail | Move lower and use wider framing |
| Moderate swell | Movement, foam lines, strong texture | Stay alert and work from safer positions |
| Strong wind | Drama in spray and cloud | Protect gear and simplify compositions |
| Overcast sky | Soft contrast and even tone | Focus on shape, texture, and layering |
| Low sun | Warm colour and long shadows | Work quickly while light angle stays useful |
Carrying the right kit without overpacking
I like to travel light enough to move confidently, but not so light that I miss useful options. My usual coastal photo pack includes a camera body, two lenses, a compact tripod, spare battery, lens cloths, a small dry bag, and a bottle of water. If I expect wet conditions, I also bring a shell layer that can handle spray and wind. The goal is not to carry everything I own. The goal is to carry what keeps me flexible.
I have also learned to pack food or a snack, because a long session can quietly become an all-day outing once I start walking between viewpoints. A steady pace helps me stay focused. When I am tired or hungry, I make weaker decisions about composition and safety, so I treat fuel as part of the photo plan.
For editing afterward, I tend to keep my field notes simple. I jot down what the tide was doing, which direction the light came from, where I found the cleanest angle, and which frame felt strongest. Those notes help me return on another day with a better sense of timing. They also remind me that a great coastal image is usually the result of many small decisions, not one lucky moment.