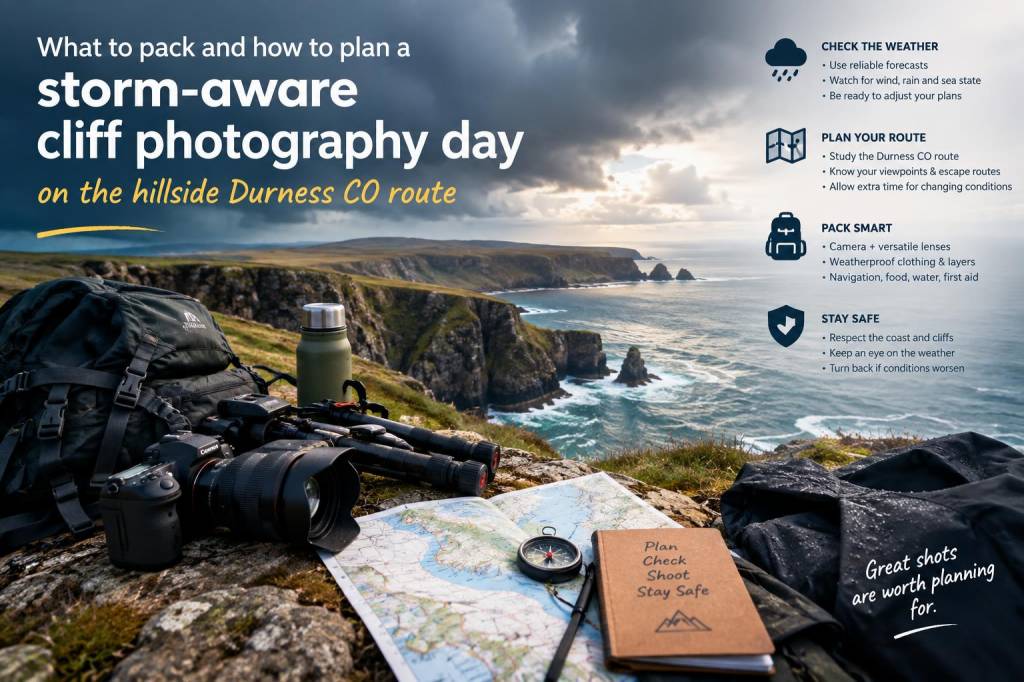
I love photographing Durness when the weather turns dramatic—storm clouds rolling in, waves battering the headlands, wind that sculpts the light. But storm-aware cliff photography is different from a gentle golden-hour shoot: it’s about planning, respect for the elements, and carrying the right kit to stay safe while getting the shots that make your heart race. Below I share how I plan a stormy cliff day on the Hillside Durness Co route, what I pack, and the practical checks I make before I leave the house.
Why I plan differently for storm days
Storms change everything: access can be limited by high tides and inundated tracks, visibility can drop in minutes, and the sea becomes unpredictable. I plan my shoots more conservatively than I would for calm weather. That means earlier starts, simpler compositions when the wind is fierce, and extra time for route-finding and safety checks. I try to think like a safety officer and a creative photographer at once—anticipating risks while staying open to the dramatic images a storm provides.
Pre-trip checks I never skip
- Weather forecast: I check two sources—Met Office and Windy (or Windy.app). Look at wind speed, gusts, and how quickly the front is moving. Gusts matter more than steady wind when you’re on cliffs.
- Tide times: For coastal headlands and beaches I cross, I always consult tide tables. High tides can cut off routes or produce dangerous shore-breaks. I use Tides Planner or the UK Hydrographic Office data.
- Wave forecasts: If you’re near sea stacks or low cliffs, check surf height and swell direction. Big swell combined with storm surge can reach places that are normally dry.
- Access and advisories: I check local ranger updates, the Durness Community Facebook group, and Scottish Natural Heritage pages for any track closures or land-access notices.
- Daylight and timing: Stormy light can be fleeting. I map out sunrise/sunset and aim to be on location well before the front arrives so I can set up safely and pick good angles.
Route planning on the Hillside Durness Co route
On the Hillside Durness Co route I pick a primary location and one or two safe alternatives. For example, if I plan to shoot the cliffs near Sango Sands I also mark a sheltered cove or a higher ridge as a fallback. I always choose routes with clear escape options—paths that lead inland and uphill rather than just along the shoreline. When possible I walk the route in fair weather beforehand to familiarise myself with tricky sections, boggy patches, and safe viewpoints.
What I pack: clothing and personal kit
Layers and protection are essential. On storm days I favour durable, waterproof, and windproof clothing over fashion. My go-to items:
- Waterproof jacket and trousers: I use a breathable Gore‑Tex jacket (e.g., Arc’teryx or Patagonia) and matching overtrousers. A hood that cinches close is crucial in gusts.
- Insulating layers: Lightweight fleece or a down/synthetic mid-layer. If you get wet, a synthetic mid-layer keeps insulating properties.
- Base layers: Merino or technical synthetic—nothing cotton.
- Sturdy boots: Waterproof, grippy soles (Vibram) and ankle support. I avoid new boots on a storm shoot.
- Hat and gloves: A windproof hat and thin touchscreen gloves plus a warmer pair for breaks.
- Pack cover and dry bags: Waterproof cover for my rucksack and multiple dry sacks for camera bodies, spare clothes, and electronics.
- Emergency kit: Lightweight first-aid, whistle, headtorch with spare batteries, emergency bivvy or survival bag, and a small multi-tool.
- Food and water: High-energy snacks, flask with hot drink, and at least 1–2 litres of water depending on day length.
- Navigation and comms: OS map and compass, phone with offline maps (Avenza Maps), and a portable battery pack. I also carry a personal locator beacon (PLB) or an InReach for remote days.
Camera and photography kit
Storm photography demands protection and speed. I travel light but well-equipped:
- Camera body: I bring one main body and a backup (a second body or a small mirrorless like Sony a7 or Fujifilm X-T series). Salt and spray can wreck electronics; spares are peace of mind.
- Lenses: A wide-angle (16–35mm or 10–24mm on crop) for dramatic sweeping cliffs, a 24–70mm for versatility, and a 70–200mm for compressed seascapes and wildlife. I often skip an ultrazoom to minimise weight.
- Filters: A strong polariser and a 6–10 stop ND for long exposures. Use screw-in filters rather than square holders when the wind is strong to reduce snagging.
- Tripod: A sturdy, low-profile tripod (e.g., Gitzo or Benro) with a good ball head. In high winds I keep the tripod low and weighted (I hang my rucksack from the centre column).
- Lens cloths and rain sleeve: Microfibre cloths, lens wipes, and a rain sleeve for the camera. I also carry a small microfiber towel to dry gear quickly.
- Spare batteries and memory cards: Cold drains batteries faster; bring extras in an inner jacket pocket to keep them warm.
- Waterproof camera bag: I use a waterproof rucksack or a camera insert inside a waterproof pack for double protection.
On-location safety habits
- Watch the sea, not your phone: I position myself so I can see the waterline and approach routes. Sneaking looks at the screen can mean missing an incoming wave or change in conditions.
- Safe distances: I keep well back from cliff edges and avoid standing on wet, undercut edges. Slippery rock and wind gusts are a bad mix.
- Anchor your tripod low: Keep the tripod legs short and spread wide. Hang weight from the column and avoid extending the centre column in wind.
- Work quickly: Storm light can change fast. I set exposures around general conditions and bracket in case the light shifts.
- Respect signage and closures: If a path is fenced or a notice advises against access, I obey it—no shot is worth a rescue call.
Composing under pressure
Storms give you drama: contrasty skies, spray, and energy. I simplify compositions—strong foregrounds, diagonal lines of the cliffs, and an off-centre horizon. When spray is heavy I embrace silhouettes and moody black-and-white processing later. I also look for sheltered viewpoints that let me include waves and clouds without being directly in the splash zone.
Environmental and community considerations
I follow leave-no-trace principles even when I’m racing light. That means packing out everything, staying on established paths, and not disturbing nesting birds or shoreline wildlife. If you’re planning to fly a drone, check both local restrictions and the Scottish Outdoor Access Code—drones can stress nesting birds and disturb people on beaches. I also touch base with any rangers or crofters if I’m working close to private land.
Simple checklist table
| Category | Essentials |
|---|---|
| Clothing | Waterproof jacket & trousers, mid-layer, merino base, boots, hat, gloves |
| Safety | PLB/InReach, headtorch, first-aid, whistle, map & compass |
| Camera | Main body, backup, wide & tele lenses, tripod, ND/polariser, rain sleeve |
| Extras | Spare batteries, dry bags, snacks, water, phone power bank |
If you’re just starting with storm photography, try a short afternoon session near a sheltered headland and build experience gradually. Storms reward patience and preparation—get those right, and the rest is creativity. I’ll often post route updates and specific tide-friendly vantage points for the Hillside Durness Co route on the site, so check back before you go. If you want personalised advice for a particular date or location, tell me the tide time and the spot you’re thinking of and I’ll help you plan it.