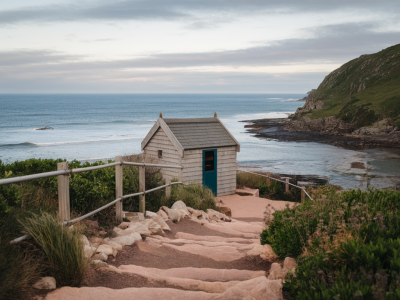
I spend countless mornings in the Durness viewing hides watching puffins hop, bob and preen in the Atlantic light, and over the years I’ve learned that the right lens makes the difference between a snapshot and a portrait that feels intimate and natural. Below I’ll walk you through which focal lengths work best at the hides, how your camera format affects your choices, practical tips for autofocus and apertures, and a handful of gear suggestions that have served me well on those windy clifftops.
Where you’ll be shooting from — why distance matters
The hides around Durness vary: some sit close to the cliff edge and give you a few metres of clearance from the puffins, others are set back where birds fly closer to the camera. That distance is the first factor to consider when picking a lens. If you’re within 3–8 metres of the birds, a moderate telephoto (200–300mm on full-frame) is ideal — you’ll capture head details, eye contact, and a soft background without crowding the puffin’s personal space. If the hide is further away or the birds are skittish, you’ll need reach — 400–600mm becomes handy to frame a tight portrait without cropping dramatically.
Focal length guide — what I use and why
| Focal length (full-frame equiv.) | Best use | Pros | Cons |
|---|---|---|---|
| 70–135mm | Environmental portraits — puffin with cliff or sea context | Wider perspective, easier to include surroundings and contextual shots | May be too short for tight headshots from distant hides |
| 135–300mm | Classic puffin portraits — head, bill details, eye catchlights | Great balance of reach and perspective compression; flexible | Requires steadier hands or support in windy hides |
| 300–600mm | Tight headshots from distance, flight frames, behaviour shots | Close-up detail without disturbing birds | Heavier gear, narrower field of view, shallower DOF at close distances |
| Beyond 600mm (or with teleconverters) | Extreme reach when hides are far or birds are very wary | Unmatched subject isolation and detail | Very heavy, needs monopod/tripod and excellent technique |
Practical note: if you shoot on an APS-C or Micro Four Thirds body, remember the crop factor. A 300mm lens behaves like 450mm on APS-C and 600mm on MFT, so factor that in — I often favour a 200–500mm on an APS-C body to get the 300–750mm equivalent range without over-spending on super-telephotos.
Aperture and background: how wide should you go?
Puffins are small, charismatic subjects, and getting the eye tack-sharp while rendering the background creamy is the goal. I typically use apertures between f/4 and f/6.3 on long lenses. Wider apertures (f/2.8–f/4) give lovely bokeh and subject separation, but on very long focal lengths the depth of field becomes razor-thin — you may lose focus on the eye if you’re too close or if the bird moves. Stopping down slightly to f/5.6–f/6.3 often provides a better hit rate while keeping the background nicely blurred.
Autofocus, shutter speed and settings that work
- Autofocus mode: Continuous AF (AF-C) with a single small focus point or flexible spot works best for portraits. The eye is tiny — aim at the eye, not the bill tip.
- AF area: Use single-point or a small zone. Some cameras’ animal-eye AF modes are excellent for seabirds; try them if available.
- Shutter speed: For perched puffins, 1/500s is a good baseline. If they’re preening or hopping, 1/1000s or faster helps freeze motion. For flight shots increase to 1/2000–1/3200s.
- ISO: Keep ISO as low as possible while maintaining the shutter speed — modern bodies typically handle ISO 1600–3200 fine in morning light.
- Stabilisation: In-body or lens IS helps, but with heavy glass and wind I prefer a monopod or stable hide support.
Lens types — primes vs zooms
I use both. A fast prime like a 300mm f/2.8 gives superb image quality and low-light performance, but it’s expensive and heavy. Zooms such as 70–200mm f/2.8 (for environmental portraits) and 100–400mm or 150–600mm zooms (for flexible reach) are my go-to when I need versatility. The Tamron 150–500mm and Sigma 150–600mm Sport are excellent value-per-weight choices; Canon and Sony’s 100–400mm and 200–500mm options are also reliable and lighter than constant f/2.8 super-telephotos.
Support and ergonomics in a windy hide
Wind is constant at Durness. You’ll get the sharpest results using a stable platform: a good monopod with a gimbal head or a light tripod is my standard. If the hide has a shelf or window, I often use a beanbag for quick framing and subtle movements — it’s quiet and won’t disturb the birds. For very long lenses I’ll bring a gimbal (Wimberley-style) to track behaviour smoothly.
Composition and working the hide
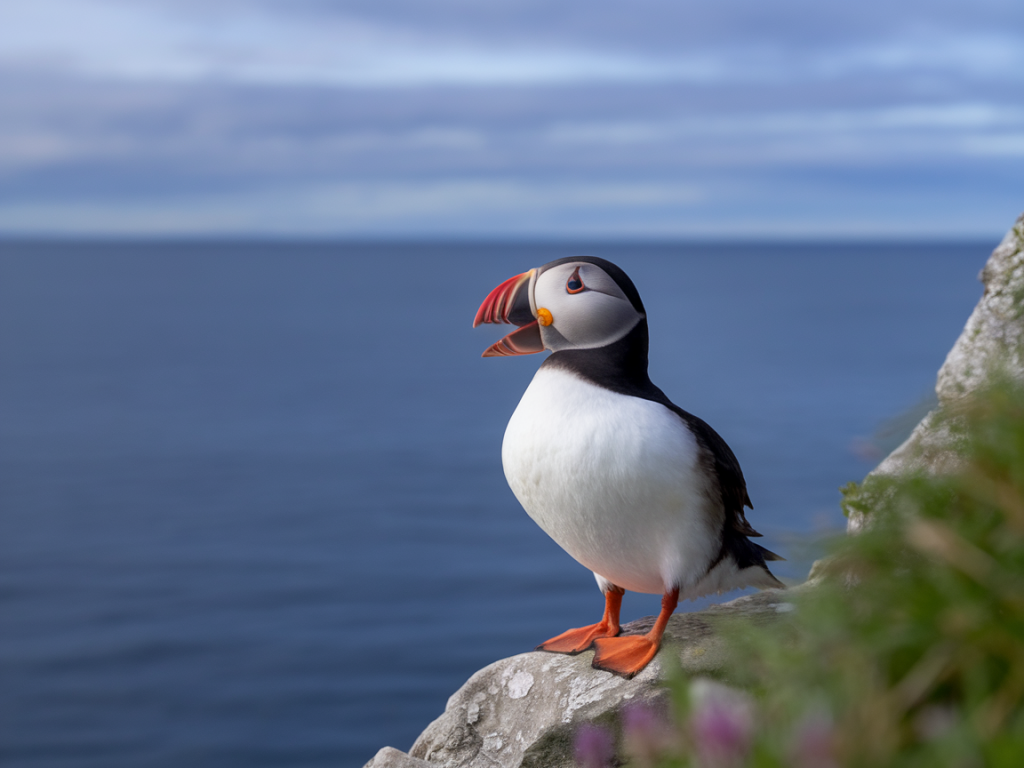
Eye-level portraits feel most intimate. Position your camera so the puffin’s eye sits roughly one-third into the frame and try to get light on the front of the bird — side lighting in early morning often creates lovely texture on the bill. Leaving some negative space in front of the bird’s gaze works well, and include hints of habitat (rock, sea spray, or ledge) for context. If the puffin turns toward you, drop the focal length slightly to include more of the bill and head-ring detail.
Etiquette and behaviour — what keeps puffins safe
- Stay inside the hide and keep movements slow. Sudden motions can alarm nesting birds.
- Keep noise to a minimum and avoid shining flashlight beams into the birds at dusk.
- Respect closures — some colonies are seasonal to protect breeding pairs.
- Don’t attempt to feed or touch birds; maintain distance even if they approach the hide.
Recommended gear (what I pack to the hides)
- Mid-range telezoom: Sigma 150–600mm (Contemporary or Sport) or Tamron 150–500mm — versatile and excellent for Durness hides.
- Short tele for environment: 70–200mm f/2.8 (Canon, Nikon, Sony or third-party) for context shots and low-light morning scenes.
- Prime if you want ultimate sharpness: 300mm f/2.8 or 400mm f/2.8 if you have it — superb for separation and low light.
- Gimbal or monopod: Manfrotto or Gitzo monopod; gimbal head for heavier lenses.
- Beanbag: small, compressible beanbag for window ledges.
- Weather protection: rain cover for lens and camera, and good gloves that allow manipulation of controls.
Post-processing tips for puffin portraits
In Lightroom or Capture One I prioritise the eyes — brighten catchlights slightly and ensure the blacks in the bill retain texture. A gentle clarity boost on the bill reveals the striations and textures without making the feathers look harsh. Use selective sharpening on the eye and be conservative with noise reduction so you don’t soften feather detail. Cropping is fine to tighten a portrait, but I prefer to get the framing right in-camera — shooting at the longest native focal length keeps quality highest.
If you’re planning a Durness trip specifically for puffin photography, check tide times, weather, and hide opening hours, and be prepared to wait — the best portraits often come from patient observation. Bring a lens that lets you work with the bird’s comfort zone rather than trying to force proximity. With the right focal length, stable support, and a soft light, those Atlantic puffin portraits will start to feel like personal encounters rather than tourist photos.