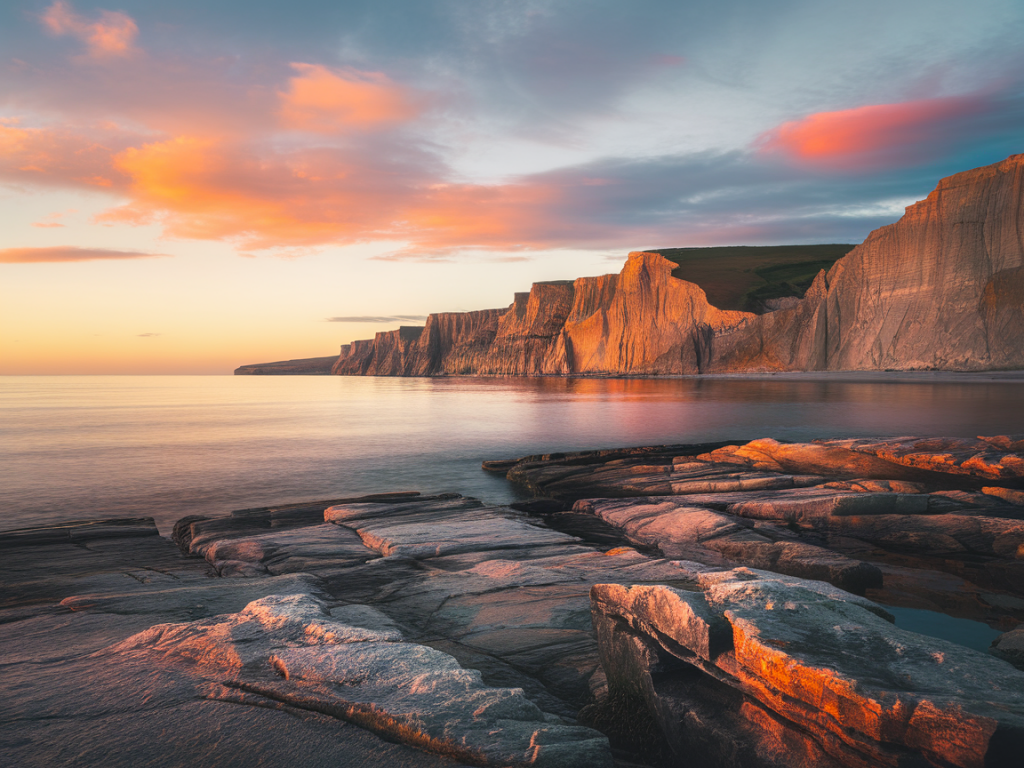
I’ve spent countless golden hours on the cliffs around Durness, waiting for that soft, low light to wrap the sea stacks and grassy headlands in warm tones. Photographing the cliffs with a phone is one of my favourite ways to travel light and still come away with images that feel cinematic and intimate. Below I share the camera settings, gear tips and on-the-cliff techniques I use to get the best results with a phone during golden hour—practical, tested in wind and spray, and tailored to the dramatic north‑coast light.
Why phone photography works here
Phones today are powerful: they capture wide dynamic range, shoot RAW, and offer manual controls. On Durness cliffs, what matters most is timing, composition and how you handle light. The phone’s small size means I can move quickly along narrow paths to chase the best angle without carrying bulky kit. That said, a few adjustments and accessories make all the difference.
Essential camera settings to start with
These are my go-to settings when I’m shooting the cliffs at golden hour. I recommend using a phone app that unlocks manual controls (Halide, ProCamera, Camera FV‑5 for Android, or Lightroom Mobile). If your default app supports RAW and exposure lock you can still get great results.
| Setting | Recommended Value / Tip | Why |
|---|---|---|
| Format | Shoot RAW (DNG) + JPEG | Retains detail and gives flexibility for recovering highlights and shadows in post. |
| ISO | Lowest native ISO (typically 20–100) | Keeps image clean and reduces noise—golden hour provides enough light for low ISO. |
| Shutter speed | 1/125s to 1/1000s for handheld; 1/8s–1/60s on tripod for silky water | Faster speeds freeze sea spray and waves; slower speeds smooth the ocean when stable. |
| Aperture | Fixed on most phones; use wide lens for depth, tele for compression | Phones simulate aperture—control depth with distance and focal choice. |
| White balance | Set to Cloudy or +2000K warmer if possible | Preserves the warm tones of golden hour; can be fine-tuned in post. |
| Exposure compensation | -0.3 to -1 EV when shooting sunlit cliffs; +0.3 if dark cliffs backlit | Prevents highlight blowout on bright cliffs and keeps texture in grass and rock. |
Focus, exposure locking and bracketing
Tap the area you want to be sharp (often mid-ground rock or a foreground flower). Then lock focus and exposure—this prevents the phone from re‑metering when you move or recompose. I almost always bracket on golden hour: take 3 exposures (normal, -1 EV, +1 EV) or use the phone’s HDR/bracketing function. This gives options for blending: keep detail in the bright sky while preserving shadow texture in cliff faces.
Composition tips tailored to Durness cliffs
When to push shutter speed vs. slow it down
On gusty days I keep shutter speeds high (1/500s or faster) to freeze grass and water spray. When the sea is calmer and I want a dreamy, milky sea, I use a small travel tripod or lean the phone against a rock and slow the shutter to 1/8–1/4s. If using a tripod, pair it with a remote shutter or the self‑timer to avoid micro‑shake.
Stabilisation and accessories I carry
Phone models and apps I recommend
I primarily shoot with recent iPhone and Pixel models because of their excellent dynamic range and RAW support. That said, many mid-range Android phones now compete well. For apps I use:
Edit workflow for golden hour cliff photos
On the cliffs I prioritise getting the shot in camera. Back home or in the van, my quick edit flow is:
Dealing with changing light and weather
Golden hour in Durness can shift quickly—clouds open and close over the sea, changing the scene every minute. I keep my phone set to RAW and bracketing so I don’t miss a moment. If the sky is dramatically backlit, expose for the highlights and lift shadows in post rather than trying to bring everything up in camera; you’ll maintain texture and mood.
Safety and conservation reminders
Always prioritise safety on cliff edges—use a long lens or move back instead of leaning over. Respect nesting birds and coastal vegetation: follow seasonal restrictions and stick to established paths. The best photo isn’t worth damaging the habitat or risking a fall.
If you’re visiting Durness and want specific spot suggestions for golden hour—where the light tends to hit best at different times of year—I’ve mapped favourites on Hillside Durness Co and include GPS points and tide notes on the site. Drop me a message at https://www.hillside-durness.co.uk and I’ll share the local fixes I use when the light turns that golden, fleece‑and‑tea perfect.